Find the best time of day for real estate photos using the Golden Hour rule. Schedule by orientation (N, S, E, W) to maximize curb appeal & sell faster.
First impressions are everything. In today's digital marketplace, a buyer decides if they love a home before they even step out of the car. In fact, most online homebuyers form an opinion within the first 7 to 10 seconds of viewing a listing. That means you have seconds to hook them, and if your exterior photo is dark, crooked, or poorly lit, buyers simply move on.
Here’s the problem: The difference between a gorgeous, high-converting facade and a dull, flat listing is often just one hour of the day.
You don’t want to rely on luck, and you shouldn’t have to pay a photographer twice because the light was wrong. We'll show you the core scheduling rule for every cardinal direction (North, South, East, West) to nail the exterior shot. Even better, we’ll show you how to use Agent Lens’s Classic Mode to guarantee perfect light, even when your schedule can’t be perfect.
1. The Golden Hour is Non-Negotiable for Curb Appeal
Why do you invest so much time staging interiors? Because you know that professional visuals make a listing irresistible. The data backs this up: homes showcased with professional photography sell 32% faster and receive 61% more online views. For buyers, photos are the number one factor in forming their first impression.
This starts outside. Curb appeal isn’t just about fresh mulch; it’s about capturing the property in the light that makes it feel warm and inviting.
What Makes Golden Hour Light So Powerful?
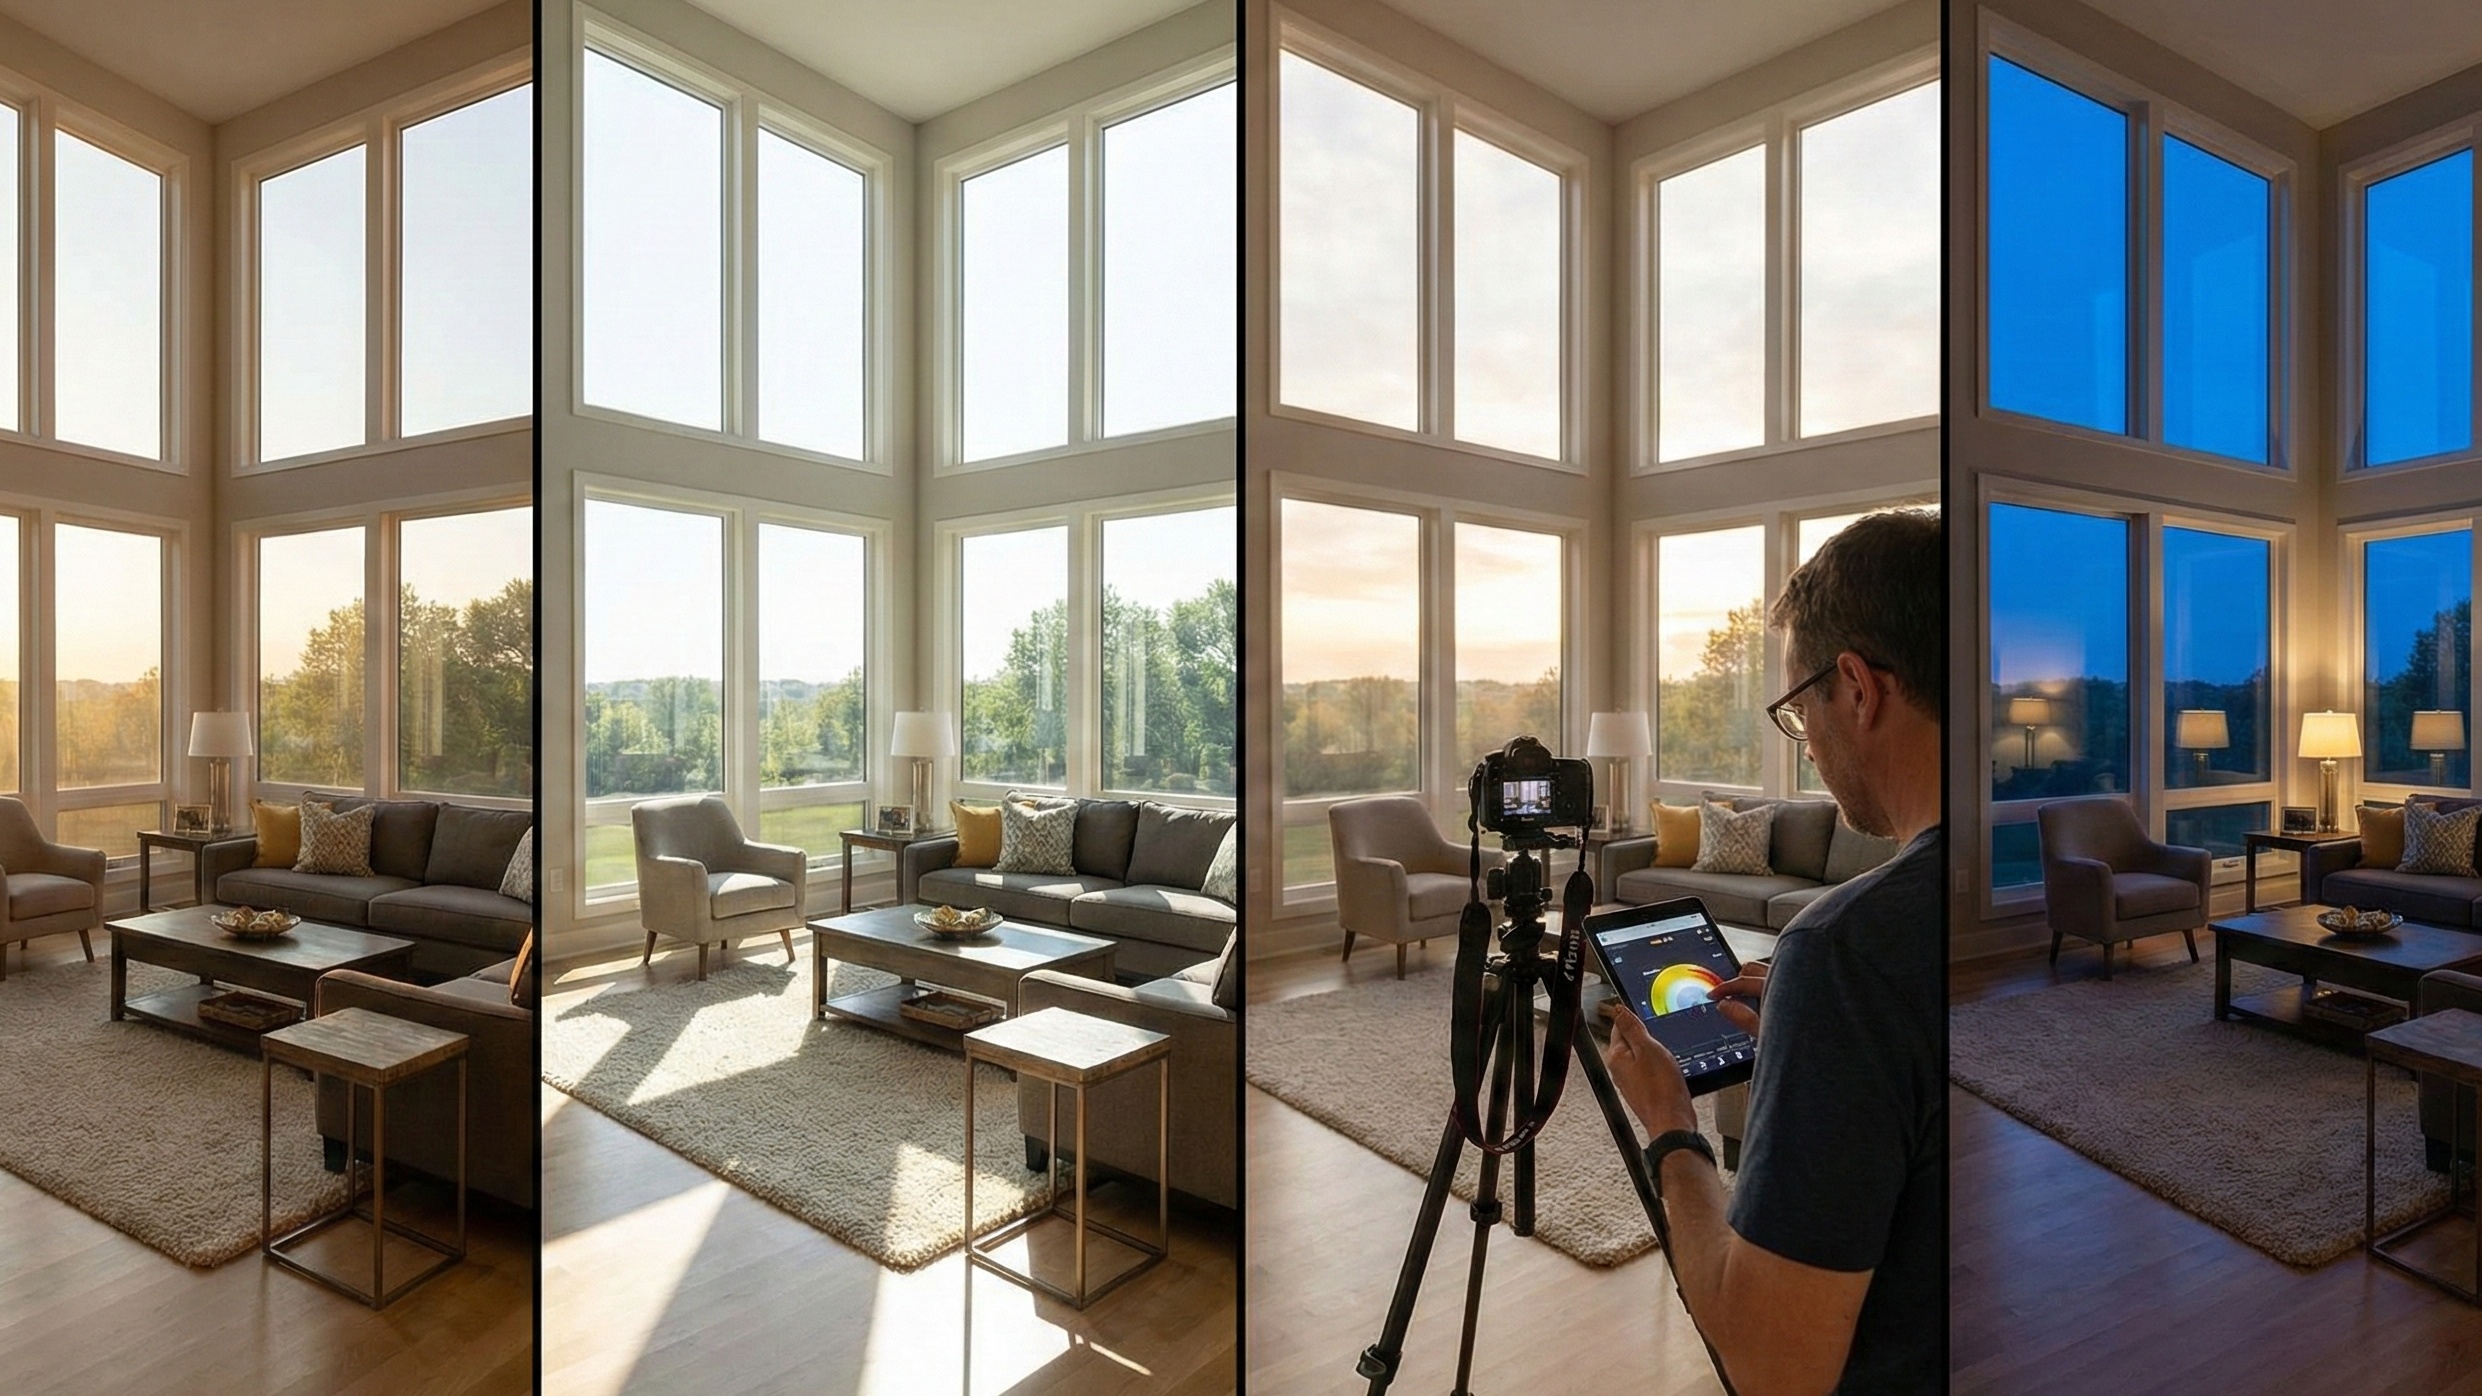
The "Golden Hour" refers to the first hour after sunrise and the last hour before sunset. During this time, the sun is low on the horizon, creating soft, warm, and highly diffused light that minimizes harsh shadows.
It automatically adds dimension to the property, highlights architectural textures, and saturates colors naturally—making brick look richer, siding look cleaner, and grass look greener. This quality of light is crucial because it helps potential buyers connect emotionally with the home.
The Hidden Cost of Poor Timing
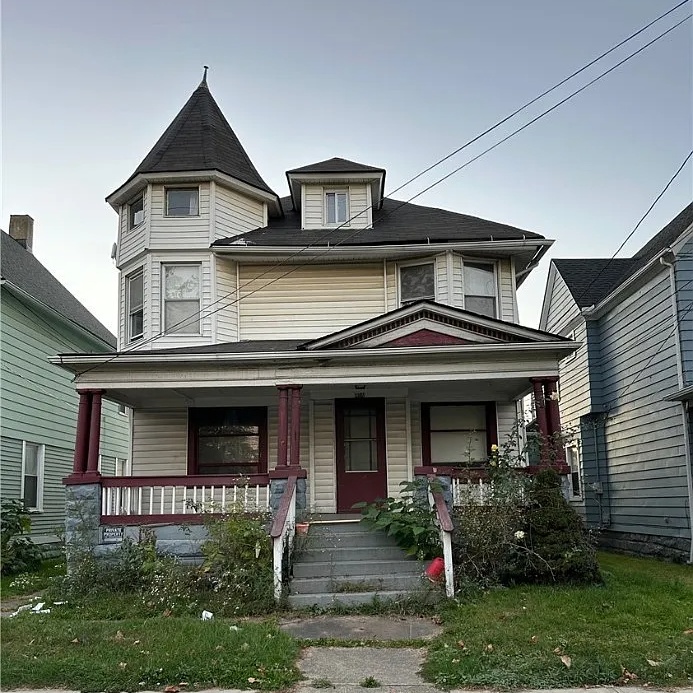
What happens if you shoot at noon on a sunny day? You get harsh, high-contrast light. This creates deep, distracting shadows, which can hide key features like entryways or patios.
Midday sun can also "blow out" highlights—making bright areas, like white siding or concrete, appear completely washed out with no detail or texture. If a photo requires intense editing to fix this poor light, it often ends up looking artificial or overly manipulated, which erodes buyer trust.
2. Schedule By Cardinal Direction: The Only Rule That Matters
To capture the best time of day for real estate photos, you need to know one thing: which direction the house faces. This determines when the sun will directly hit the facade, providing that desirable soft, grazing light that highlights features.
This strategic scheduling ensures you avoid high-noon shadows and fully utilize the sun to boost curb appeal.
East-Facing Homes: Early Bird Gets the Light
Best Time to Shoot: Early Morning
Why: East-facing properties catch the soft, direct light of the rising sun. This light is warm and flatters the front of the home without being overly harsh. Schedule the shoot shortly after sunrise to capture the facade in its best light. If you wait until the afternoon, the front will be fully shaded, making the image flat and dull.
West-Facing Homes: Embrace the Afternoon Glow
Best Time to Shoot: Late Afternoon or Evening
Why: These properties receive the best light as the sun begins to set. The late-day sun hits the facade directly, providing warm, dramatic illumination that showcases features beautifully. This also sets you up perfectly for a twilight shot (more on that next).
North-Facing Homes: The Soft Light Window
Best Time to Shoot: 10:00 AM – 2:00 PM
Why: North-facing homes rarely get direct sunlight, which is actually a blessing. The light they receive is indirect and consistent throughout the central part of the day. Shooting between 10 AM and 2 PM minimizes any side shadows and ensures the indirect light is strongest, reducing harshness and creating a naturally diffused look.
South-Facing Homes: Double the Opportunity
Best Time to Shoot: Early Morning or Last Thing in the Day
Why: These facades receive the most sun exposure throughout the day. To avoid the intense, shadow-casting light of noon, focus on the shoulder hours—shortly after sunrise or just before sunset—when the light is grazing the front and less aggressive.
3. When to Use Twilight Photography (The Emotional Edge)
You know how a home looks during the day, but how does it feel at night? This is the secret power of twilight photography, also known as the "blue hour."
This is the short period just after sunset or before sunrise when the sky is a deep, rich blue, and the interior lights glow warmly. This creates a stunning contrast that daytime photos can't touch. Listings that include twilight photos can see an increase in views by an average of 76%.
Twilight photos instantly add a sense of luxury and exclusivity to your listing. They are the best way to showcase:
Exterior Lighting: Landscape lighting, pathway lights, and accent fixtures.
Interior Warmth: The inviting glow of interior lights streaming from the windows.
High-End Features: Pools, hot tubs, and fire pits.
If coordinating a precise twilight shoot is too complex for your busy schedule, using Virtual Twilight is a cost-effective, flexible alternative. It lets you transform a standard daytime photo into a dramatic blue-hour shot digitally, avoiding weather and timing issues.
4. The Agent's Dilemma: Time, Cost, and The AI Solution
Here’s the reality for busy agents: you can’t always control the schedule. The closing date shifts, the seller is only available on Tuesday at 11 AM, or you get a last-minute booking for a West-facing home at high noon. Sometimes, despite your best efforts, you get "horrible times of day for the lighting".
When the perfect natural light fails, you need a guarantee that your images will still look professional. Traditionally, the fix was slow and expensive: outsourcing to human editors.
Feature | Human/Traditional Editor | BoxBrownie (Virtual Staging) | Agent Lens (Pro Plan) |
|---|---|---|---|
Basic Editing Cost | $0.30–$0.80 per image | Fixed low rate per image | $0.10–$0.33 per image (Pro plan) |
Turnaround Time (Basic Edit) | 24–48 Hours | 24 Hours | 8–15 Seconds |
Staging/Design Expertise | Superior for luxury/artistic | No staging/design expertise | AI-powered design styles |
Lighting Fix (Exposure) | Requires bracketing/HDR blending | Available | Classic Mode (Auto-fix lighting, sharpness, color) |
Want to test this? Agent Lens offers 3 free credits on signup—no credit card required. For more on maximizing listing views, see Listings with Video Get 403% More Inquiries.
Introducing Agent Lens: Your Lighting Insurance
We built Agent Lens as a Chrome extension that uses AI to transform real estate photography. It's your fast-action solution when lighting is less than perfect. Our AI engine analyzes your image, detecting lighting inconsistencies, color imbalance, shadows, and clarity issues.
Our universal enhancement tool is called Classic Mode. This mode is designed to instantly solve the most common lighting failures without making the image look fake.
How it works:
Here’s how Agent Lens’s Classic Mode solves poor lighting:
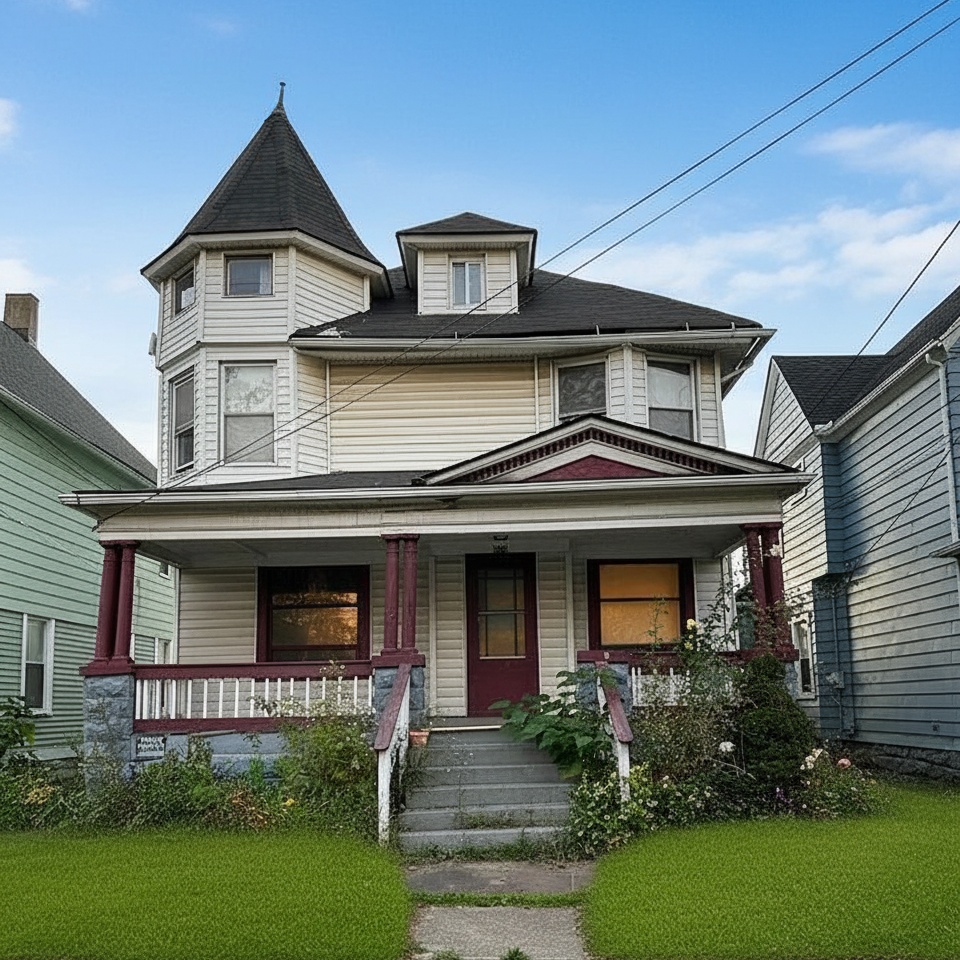
Exposure Correction: It automatically fixes under-exposed or dark areas, instantly lifting shadows and restoring detail that was lost to poor light.
Color Accuracy: It corrects color imbalance, such as the yellow cast from indoor lighting mixing with outdoor daylight, to keep colors neutral.
Saturation Boost: Classic Mode includes a crucial 15-25% saturation boost. Unlike a global saturation slider that can create unnatural colors, AI applies a "smart saturation" that makes skies and foliage pop while preserving the authenticity of the home's materials.
Window Light Enhancement: This feature is critical for interiors. It helps achieve a balanced exposure where the view outside the window is visible, even if the original photo had "blown out" windows. This is similar to a complex manual "window pull" technique, but delivered in seconds.
5. The Competitor Cost/Speed Trap
When you compare AI-driven solutions to traditional editing platforms, the choice comes down to speed, cost, and specialization. While we respect other services, you need to understand where they fall short for high-volume agents.
BoxBrownie, for instance, offers a popular, pay-per-use model with no subscriptions. That’s great for occasional use. However, their virtual staging turnaround time is 48 hours, which can kill your listing launch speed. More importantly, their photos are edited by digital editors who aren’t specialized designers. They deliver basic service, but they don't provide the specialized design expertise that truly drives value.
With Agent Lens, we provide 11 exact modes—like Virtual Declutter and Exterior Makeover—to ensure every image is strategically designed for the real estate market. You’re not just getting a brightness boost; you're getting specialized, high-quality, AI-driven transformations in 8–15 seconds for as little as $0.10 per image on our Pro plan. For more on removing clutter from occupied homes, check out Learn how to market tenant-occupied homes with Virtual Declutter.
6. How to Guarantee Perfect Light with ‘Classic Mode’
Let’s put it all together. Your primary goal is to schedule your shoot for the hour that captures the sun grazing the primary facade (see Section 2). But when life, sellers, or scheduling conflicts get in the way, you need a consistent workflow that guarantees quality.
The Fail-Safe Workflow:
Default to the North-Facing Window: If you have complete scheduling control, target the 10:00 AM – 2:00 PM window. This is the time when the light is most consistent and indirect, minimizing harsh shadows for any exterior.
Turn Off the Lights (If Possible): When shooting interiors, rely on natural light. Mixing daylight from the windows with warm tungsten or yellow house bulbs creates jarring color casts. A good photo should only use one kind of light temperature.
Upload and Enhance: If the resulting photo is dull, dark, or yellowed, run it through Agent Lens's Classic Mode. The AI will automatically address the color casts, restore texture in overexposed windows, and balance the shadows, giving you that "perfect light" look without the two-day wait time.
Don't let a bad photo kill your commission. The $3,000–$11,000 difference a high-quality photo can make is too valuable to leave to chance. Mastering the Golden Hour rule and having an AI-driven backup plan are no longer optional—they’re operational necessities for a successful agent.
Conclusion
The quality of your listing photos is the single greatest competitive edge you have. The best time of day for real estate photos is dictated by the sun’s position, and mastering the cardinal direction rule is your first and most effective strategy. Aim for the soft, warm light of the Golden Hour to capture the 76% increase in views that twilight and high-quality images provide. When timing is impossible, Agent Lens’s Classic Mode is your insurance policy. It delivers instant, specialized exposure and color fixes, guaranteeing that every image—no matter when it was shot—looks high-quality and professional. Ready to eliminate bad photos from your workflow?
Free Real Estate Tools
Explore our free calculators and AI tools for agents:
Transform Your Listings with AI
Apply professional virtual staging and enhancements in seconds. Start transforming your listings today.
Explore Virtual Staging Options
Start with our most popular room & style combinations: